Joe Touring – Part 6: Wiring
I have to say that I’m the definition of the saying “Jack of all trades, master of none.” For over the last 20 odd years or so, I’ve built engines, cut up suspensions, beat on metal, and recreated some great looking, but the one thing that I have always been hesitant to attempt is rewiring a vehicle.
For years I’ve known about the wiring harnesses manufactured by Painless Wiring, and heard about how easy they are to install, or troubleshoot if something happens down the line after you’ve operated the truck for some time. However, I still felt “allergic” to electricity and opted to focus on other parts of the build process.
It wasn’t until I had met with the guys at Painless Wiring a few times discussing some of their new products that were far more advanced than the regular old systems that they have made so easy to use. During that conversation about their new transmission controller for the GM automatics, Jeff asked if I had ever installed one of their kits. I couldn’t lie, and remarked that I hadn’t, and should really get over my electro-phobia, and give it a shot.
While working on our low buck project truck, (Project JT) it was made clear that a new wiring system needed to be placed in the truck due to the extensive time served in the truck. The engine of choice for this project was an LS series engine, which already had its own engine harness and computer system to operate the fuel and ignition requirements. Plus, we enhanced the shift points using a Painless TORC controller unit.
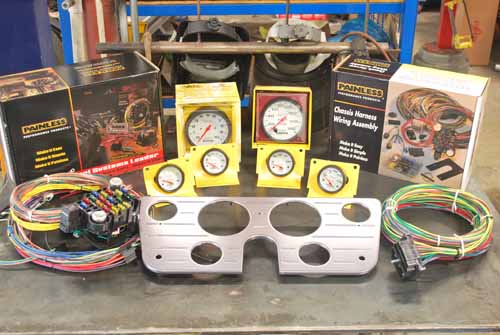
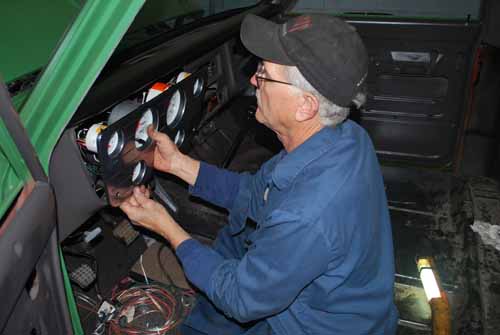
Upgrading the wiring brought to our attention that the stock gauge panel, and the factory gauges themselves, looked tired and were not functioning as they should. To liven things up, a No Limit gauge panel and some Auto Meter gauges seemed to fit in with the modernization of the trucks electrical system.
To add some creature comforts to the truck allowing us to enjoy the ride a little bit more, we wanted to upgrade the steering column, so the old “fixed” column was replaced for a new “tilt” column from Ididit. While we were installing the tilt column, we came across Ididit’s new “push to start” keyless ignition switch.
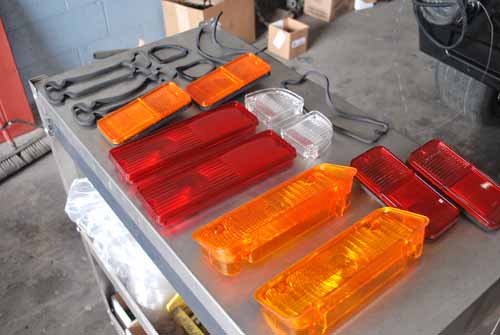
Of course it wouldn’t make sense to rewire a truck and forget to replace the outside lenses. A stop by the folks at Brothers Truck Parts remedied this dilemma, where they stock all of the correct lenses for the taillights, parking, and side markers in both standard and deluxe series models.
So are you ready to join in this quest to harness and control electric power in your truck? Read on as we walk you through how easy and “painless” it is to rewire your truck.
 |
 |
 |
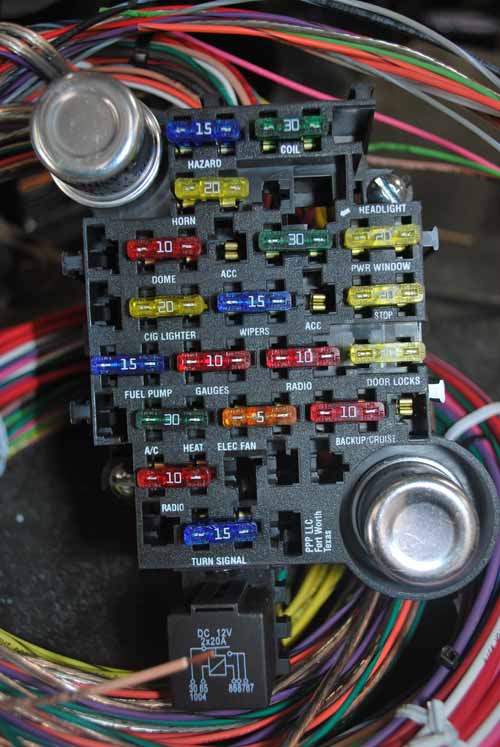
Painless really makes things easy to understand as you can see in these photos of the fuse block, and the weatherproof bulkhead connector that mounts to the firewall. To manage the lengths of wire maintenance as an easy to run/control way of fastening your wiring to the vehicle, Painless introduced this “power-braid” style of wire loom that is easier to use than the old plastic split loom covering that is generally seen in other kits.
 |
 |
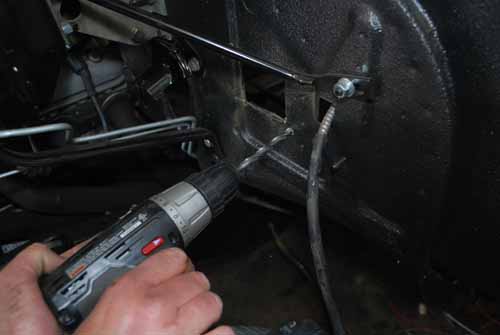 |
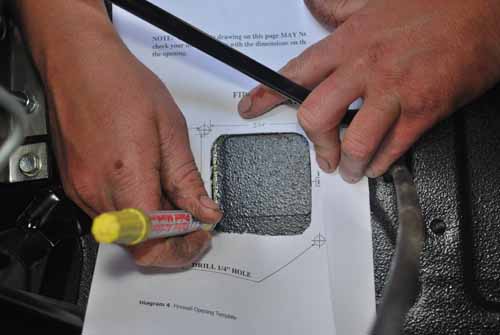
Upgrading to an 18 circuit fuse block means more terminals for more accessories, so the fuse block is going to be larger than the stock one. Don’t worry, Painless provides a paper template that allows you to trace out the size of the new fuse block and where you’ll need to trim out the opening to accept the larger unit. A cut off wheel cuts through the firewall with ease, while a 3/8” drill bit is used to drill the mounting hole that keeps the fuse block in place.
Next, place the fuse block up under the dash running the studs on the block though the hole that was just drilled. Then have a buddy spin the nuts over the studs from the other side of the firewall to hold it in place.
 |
 |
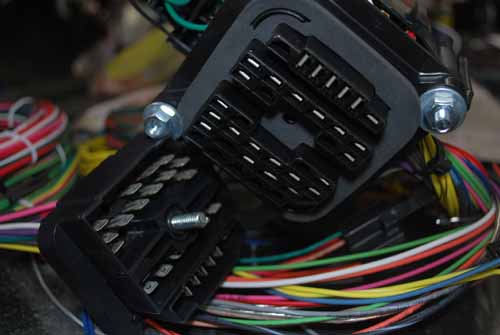
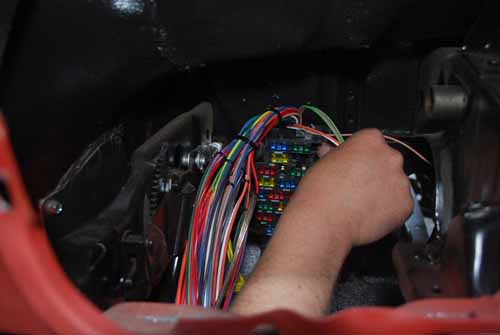
This bulkhead connector makes life for the front half of the system. Not only does it help with installation, but if you need to put the front clip off the truck in the future, this “plug” will allow you to do so without interrupting your wiring. The plug is weather-proof, which limits the amount of problems that ole mother nature can throw at it. To install this plug, locate the pattern of the plug/ fuse block, align them up, and tighten down the set screw in the center with a screwdriver.
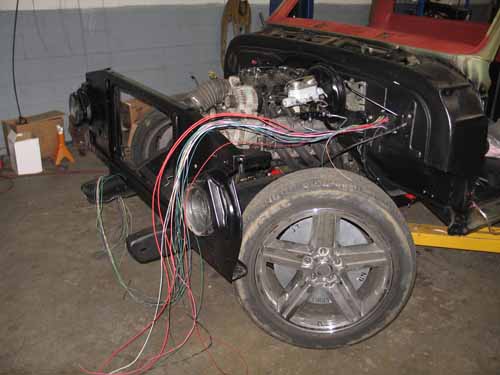
This progress photo gives you an idea of what you can expect. All the front end wiring is fed by the bulkhead plug. Don’t stress, Painless is best known for their printed labeling on each wire telling you exactly what wire is what.
 |
 |
 |
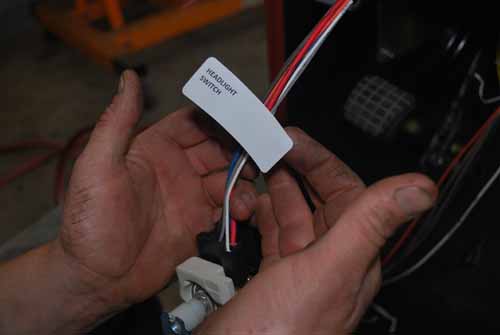
If your eyesight isn’t as it used to be, or if this is something that your going to take your time at doing, Painless includes paper labels that you can tag to help “keep your place” while doing the job, or to mark where you left off as shown here by our good friend Owen.
 |
 |
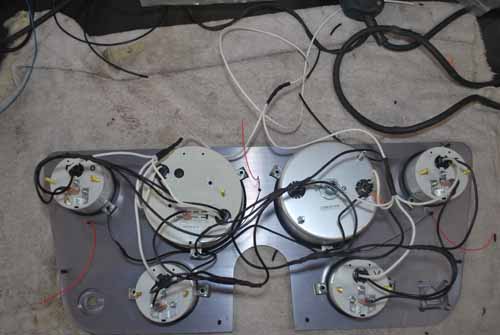 |
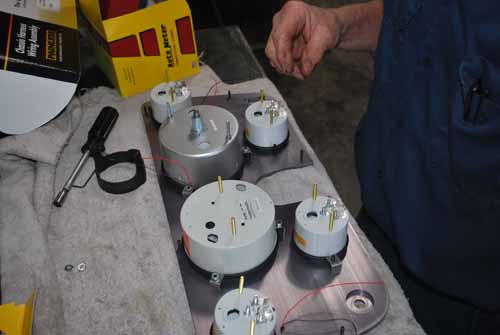
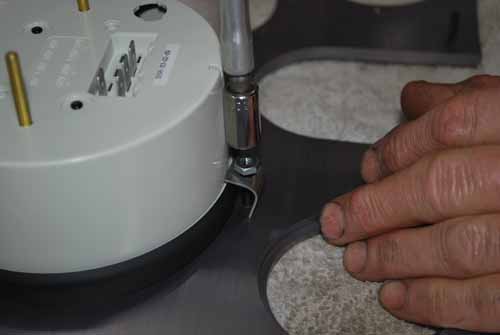
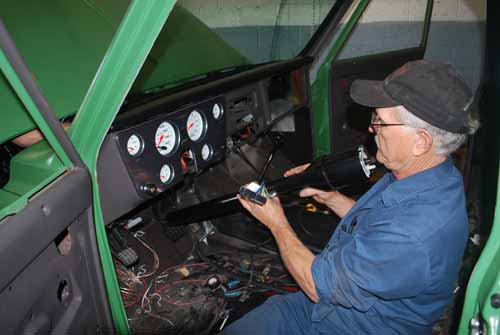
As Owen takes a break, Mike is taking on the task of the gauge panel and the instruments. First step is to lay out how you want to read the gauges while driving. Once that is set, the No Limit gauge panel contains these small clamps that hold the gauge to the back side of the panel for a sleeker look. To hold clamps over the gauges, run the nuts over the studs until they’re sung. Then use the gauge panel section of the kit to run the wires to the proper locations.
 |
 |
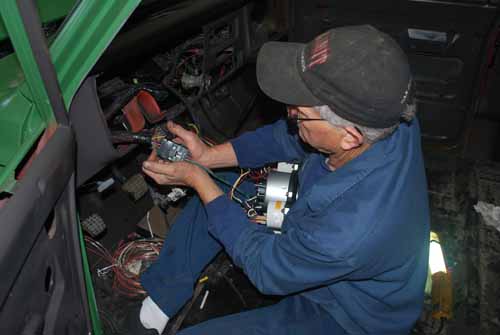
The gauge panel is now ready to be placed into the dashboard and seen here is Mike plugging in the dash harness to the main harness using another weather-proof style plug. After that step, he aligns the mounting holes in the dashboard and tightens the panel into place.
 |
 |
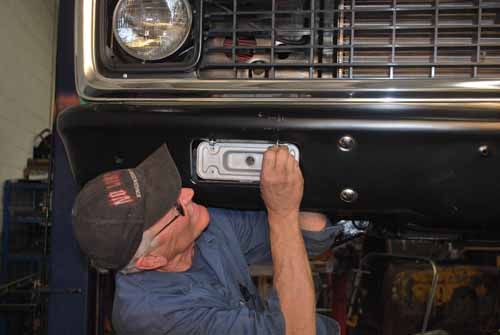
Here, Mike fits the wire lead for the parking lights into the front bumper from Brothers. Next, as I mentioned before, a few sets of “standard series” lights were fitted to the outside of the truck which can all be found in Brothers catalog.
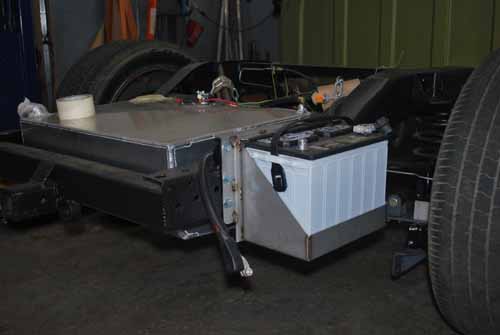
Locating the battery to the rear of the truck has many advantages, one being weight transfer, giving the truck more rear wheel traction, or another being the room that is created in the engine compartment. No Limit makes this an easy deal by manufacturing a “drop out” style of battery box that can be located under the bed. If the battery needs service, the removal of one nut and bolt allows the battery tray to slide down the mounting plate gaining access to the battery terminals.
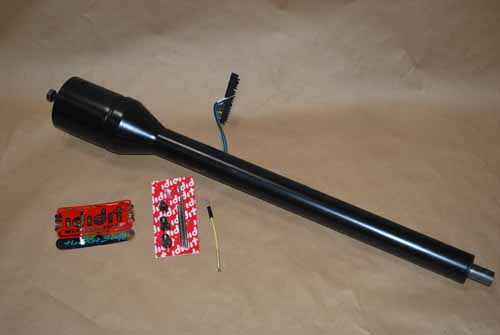
Ididit’s tilt column makes it easy to enjoy how the driver feels while driving the truck. They simplified the tilt column idea by manufacturing a direct fit unit for the C-10’s so you don’t have to search for an old column out of a wrecking yard to come home and make it work in your truck.
No secrets here! Just mount the new column in the truck just as if it was the stock one, but take notice that the factory style turn signal wiring is configured into a plug that pairs up to the one provided by the Painless kit.

This is a tough one to see, but using a modern style universal joint that attaches from the column to the steering shaft gives you a better feel of the road, and is much safer to operate. This unit is from Flaming River which is a high quality unit that is very affordable as well, making it well worth the extra time to install, as well as the extra bucks.
 |
 |
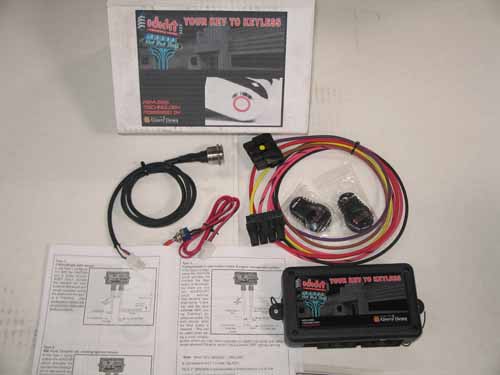
Here’s Ididit’s keyless ignition switch kit that includes everything to get rid of the old ugly tumbler. Prone to rattles while driving and scratching the paint on your dash, the keyless systems eliminate those problems all together. (Plus it’s fun to “show off” to all of your friends.)
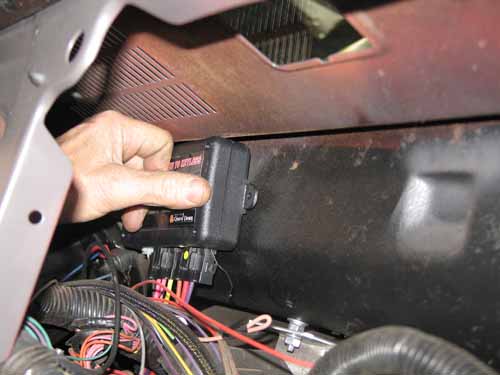
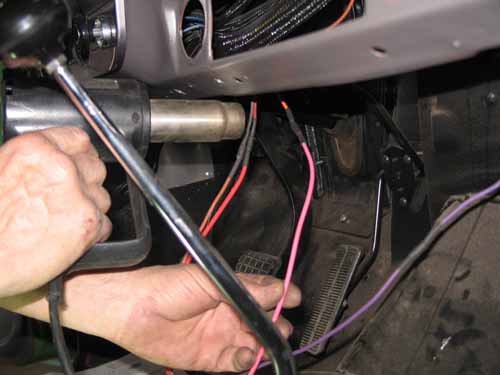
Locate an area under the dash where the control module can be placed out of sight. Two sided tape, or velcro can be used to mount the unit making it easy to install, or remove to service.
 |
 |
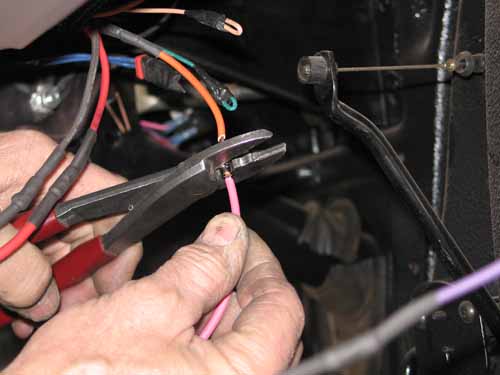
Locate the marked wires for the ignition switch. Cut the wires and tap into the ignition modules wires to the main harness. Be sure to use shrink wrap over the connections preventing contact with any metal surfaces.
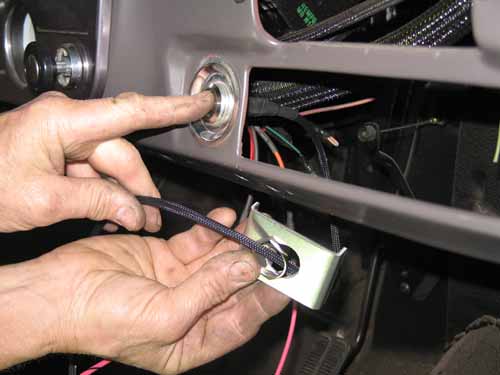
Slide the mounting nut and bracket over the wire lead that holds the “push button” in place on the back side of the dash.
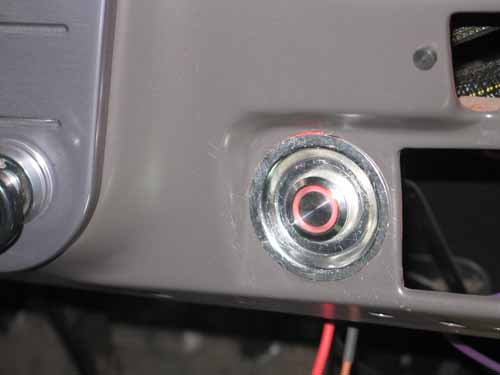
With the use of the provided key fob, you can now start your truck with the push of a button and amaze your friends at the same time. On a more serious note, the Ididit keyless system does also provide a security aspect as well as the tricks you can play on people. Without the key fob in close proximity, your truck is safe from the dishonest citizens that may be lurking about.
Sources:
Painless Wiring www.painlesswiring.com
Auto Meter gauges www.autometer.com
Ididit www.ididitinc.com
Flaming River www.flamingriver.com
Brothers www.brotherstruckparts.com
No Limit Engineering www.nolimit.net
Sources:
No Limit Engineering: www.nolimit.net
SEM “rock-it liner” www.semproducts.com
Coast Airbrush: www.coastairbrush.com
Chevy Truck Salvage: (714) 554-1850